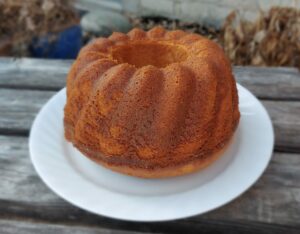
Cardamon Cake

Picture of Cardamon Cake, but it's really the smell that sets this one apart

Summary

  • Preparation: 20 min (+10 min for the cardamon pods)
  • Cooking: 60 min
  • Total: 80 min

Ingredients

  • 300 g (1⅓ cups) softened butter (keep wrapper to grease Bundt)
  • 4 eggs
  • 320 g (2½ cups) plain flour
  • 380 g (1 ⅔ cups) caster (superfine) sugar
  • 3 tsp baking powder
  • 80 pods (2 generous tablespoons of pods) of freshly ground cardamon
  • 200 ml (1 cup) milk

Method

  1. Pre-heat the oven to 175°C /350F
  2. Cream butter with moderate speed electric mixer for 3 min
  3. Add eggs, stir for 1 min
  4. In a separate bowl, mix the flour, sugar,
  5. baking powder and cardamon
  6. Grease a 2¼ litre (10 cup) Bundt with butter and then sprinkle the inside with the dry portion of the dough to coat it, then pour rest back in with dry portion
  7. Stir dry portion into the egg/butter mixture.
  8. Stir in the milk
  9. Carefully pour into the prepared Bundt. Avoid creating air pockets. Tap the pan to remove any air bubbles and then tilt the pan gently, so that the batter runs up the sides.
  10. Bake for about an hour until it is golden brown, just beginning to pull away from the side of the Bundt and a skewer poked into the cake comes out clean.
  11. Let the cake cool in the Bundt for 10 minutes and then turn out on to a wire rack to cool completely.
  12. When cold, transfer to a serving plate or board.
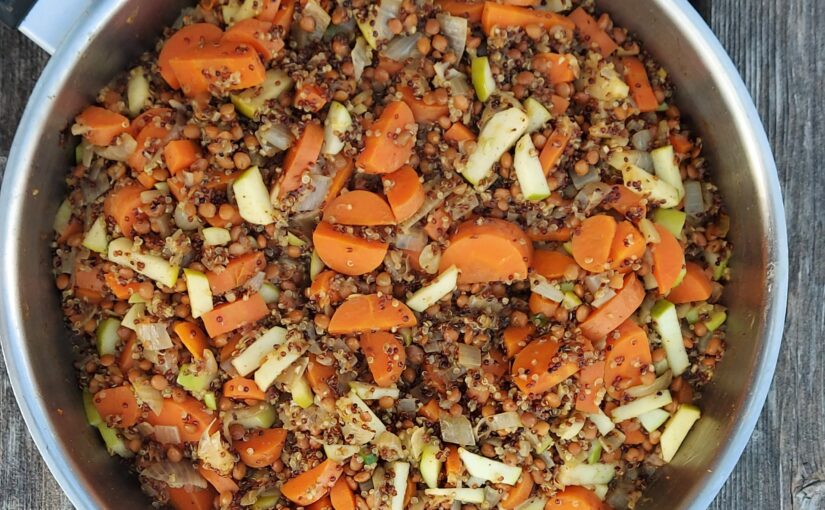
Leftovers?

Are you kidding?

Lentils and Quinoa

Lentils and Quinoa in a frying pan
  • 1 tbsp olive oil
  • 2 onions, chopped
  • 3 cloves garlic, minced
  • 1 1/2 tsp ground cumin
  • 1 tsp curry paste
  • 1/2 tsp each cinnamon and salt
  • 4 carrots, sliced
  • 1 cup quinoa or rice
  • 2 cups vegetable stock
  • 1 can (19 oz) lentils, drained and rinsed
  • 1 apple, unpeeled and diced
  • 4 green onions, sliced
  • 1/2 cup low fat plain yogourt
  1. Heat oil over medium heat.
  2. Cook onions, garlic, cumin, curry paste, cinnamon and salt stirring often for about 5 minutes or until softened.
  3. Stir in carrots and quinoa-cook, stirring occasionally for about 1 minute.
  4. Pour in stock and bring to a boil. Reduce heat, cover, and simmer for about 20 minutes until quinoa is tender and most of the liquid is absorbed.
  5. Stir in lentils, apple and green onions. Cook for about 5 minutes or until lentils are heated through.
  6. Serve with a dollop of yogurt.

Sauerbraten

There are two parts to this recipe, marinating and roasting. There seems to be some debate about how long, I have seen as little as 2 days and as much as 3 weeks. If meat in the fridge for that long freaks you out keep in mind that vinegar preserves; there are lots of opinions out there for how long so google as needed. Some people seem to boil the marinade briefly before putting the meat in.

This recipe is “Frei nach Dr. Oetker” but there are some notes and tweaks.

Marinating

  • 1 “roast for 4-6 people”
  • for marinade:

Peel and slice onions thinly. Mix other marinade ingredients and put the roast and marinade in a container that is as small as can fit all of it, so that as much of the meat as possible is submerged. Alternative: put it in a zip lock or vacuum bag.

Marinade for 2-21 days. Turn the meat occasionally during marinating so that all of it gets covered into the juice.

Roasting

  • Suppengrün – a carrot and a stick of celery and an onion
  • 50g raisins
  • 50ml port or red wine or water
  • 50g (1-2 slices) of German pumpernickel (not the spongy stuff you call pumpernickel in North America), or I prefer my favourite Flambe bread from our local German baker
  • oil for browning the meat
  • 1 tbsp Rübenkraut (not just golden syrup) or honey

Soak raisins in port so they are nice and soft when you add them to the sauce later. Keep this separate until near the end of cooking so it doesn’t get blended with the rest)

Take the meat out of the marinade and keep the marinade separate since it will be used for cooking

Brown the meat on all sides in oil in a frying pan that is deep enough for roasting it with its sauce.

While the meat is browning, cut up the suppengrün into small cubes.

Once the meat is browned, put the suppengrün, Rübenkraut or honey and about half the marinade into the frying pan with it and stew in a light boil for 30 min with a lid on. Add marinade as it steams off.

Break up the pumpernickel or Flambe into crumbs and add it to the frying pan.

Stew for another 1.5hrs or so.

The sauce

Take out the meat

Put the sauce and vegetables through a blender. It should end up a as a somewhat thick sauce. Take it out of the blender, and add the raisins.

Serve with dumplings and red cabbage


Belt buckle experiment with 3d printing in metal

Rowing seat belt buckle 3d printed in steel

Here are two belt buckles I designed and then had 3d printed in steel. The first is a rowing seat, and the second the head of a modern rowing oar.

Modern rowing oar belt buckle 3d printed in steel

I like how the seat turned out, the layering artifacts of the 3d printing process give it almost a wood grain look, which is similar to the original item, which used to be made out of wood.
I find the layering on the

Back of the rowing oar belt buckle 3d printed in steel

oar kind of distracting; if I get another one printed I might see if they take requests on how the item is oriented when it’s printed. Or I could add a bit of a compound curve to the piece so the lines don’t end up straight.

3d printed fence for a Stanley #78 Rabbet Plane

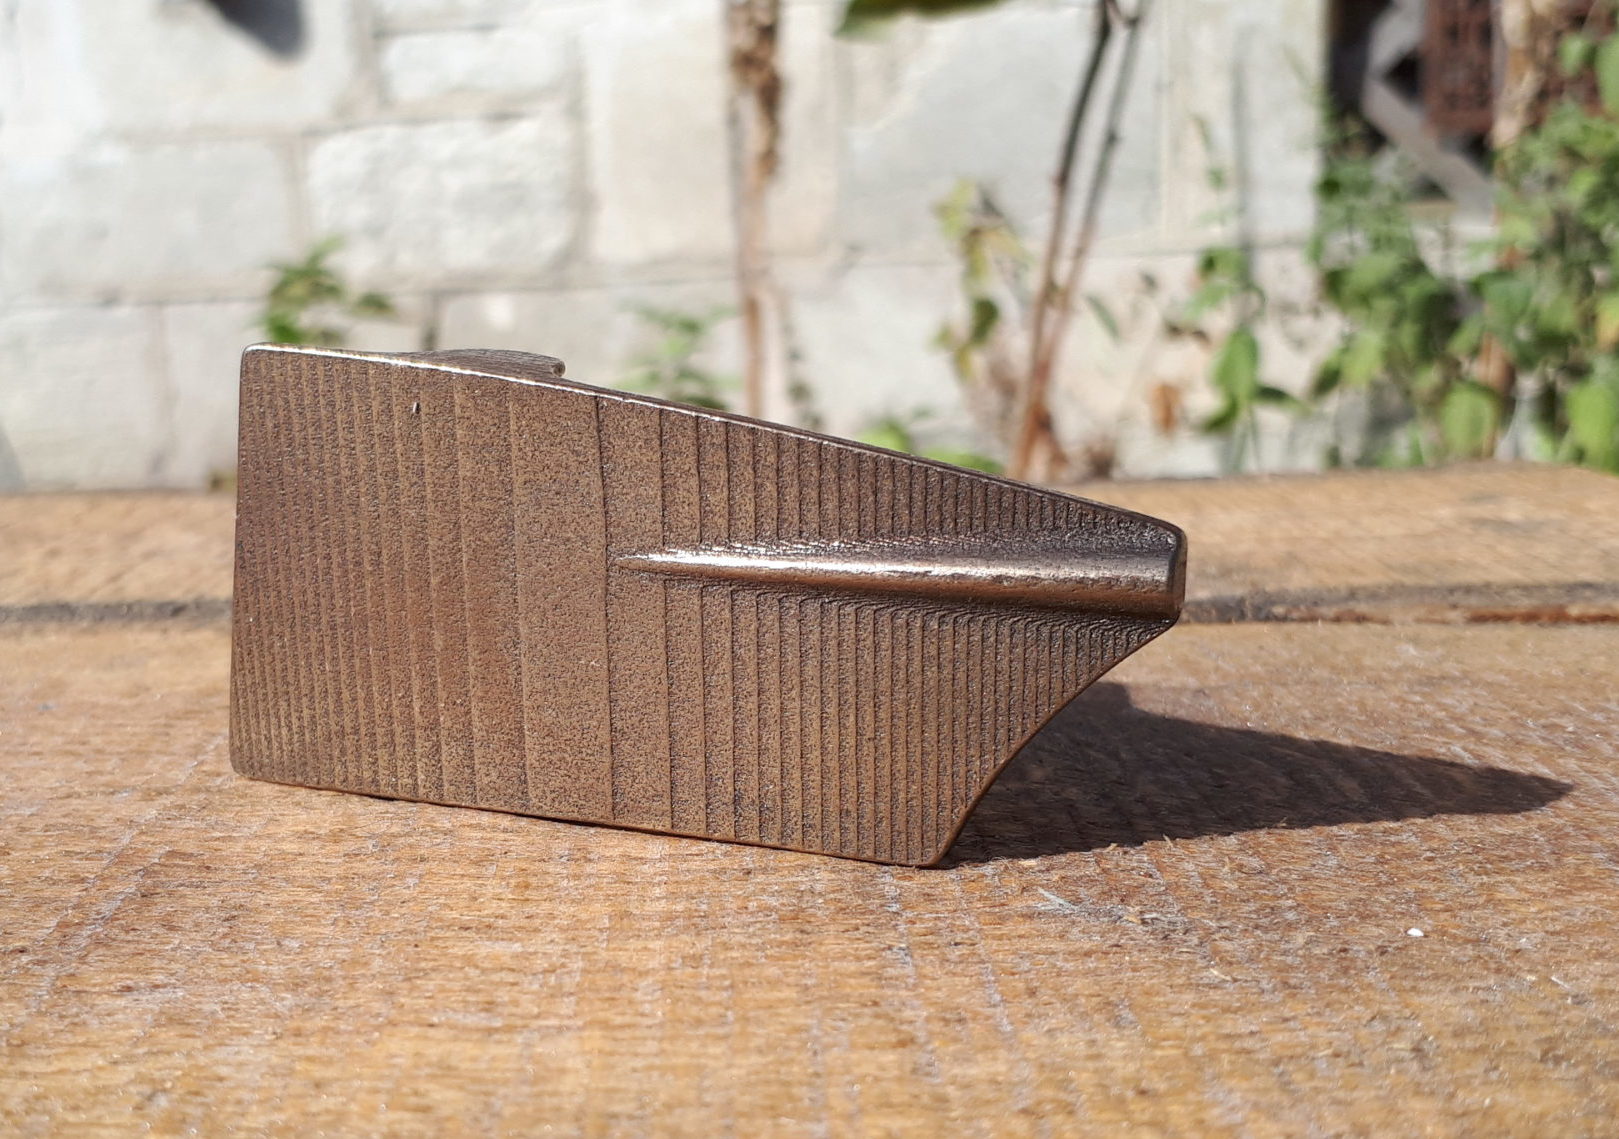
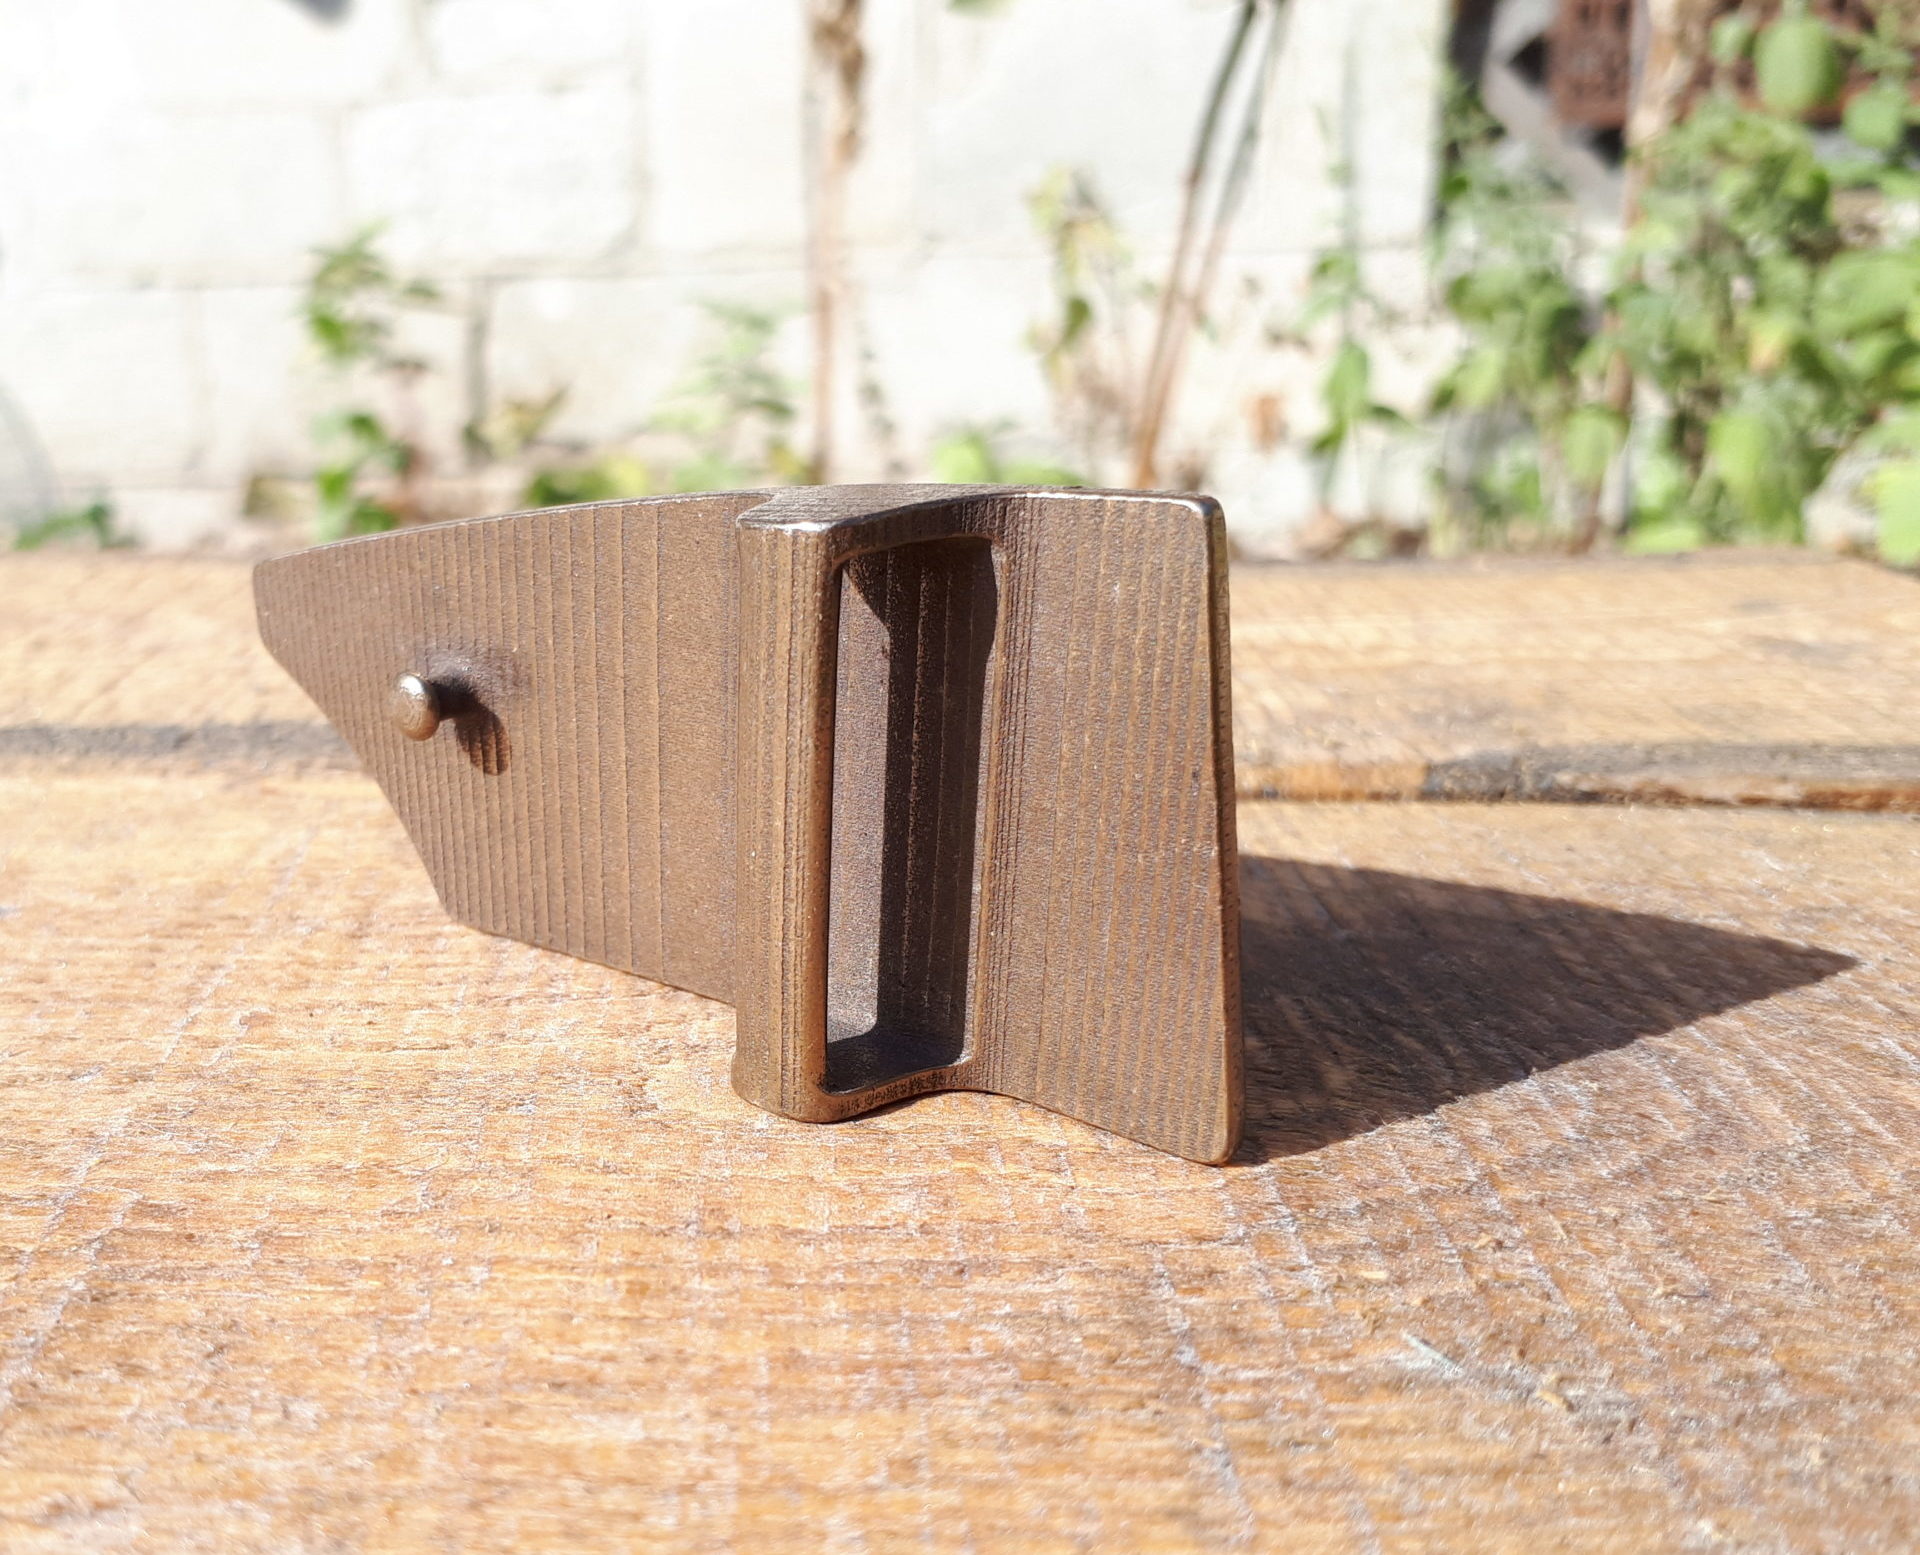
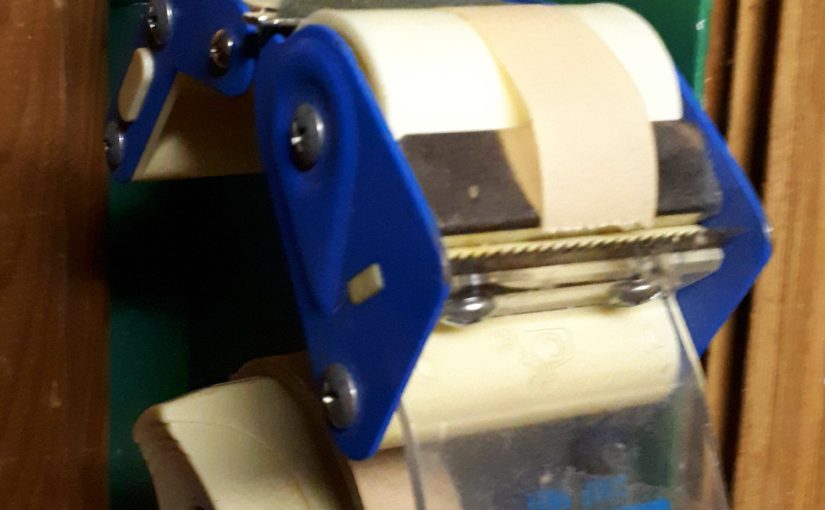
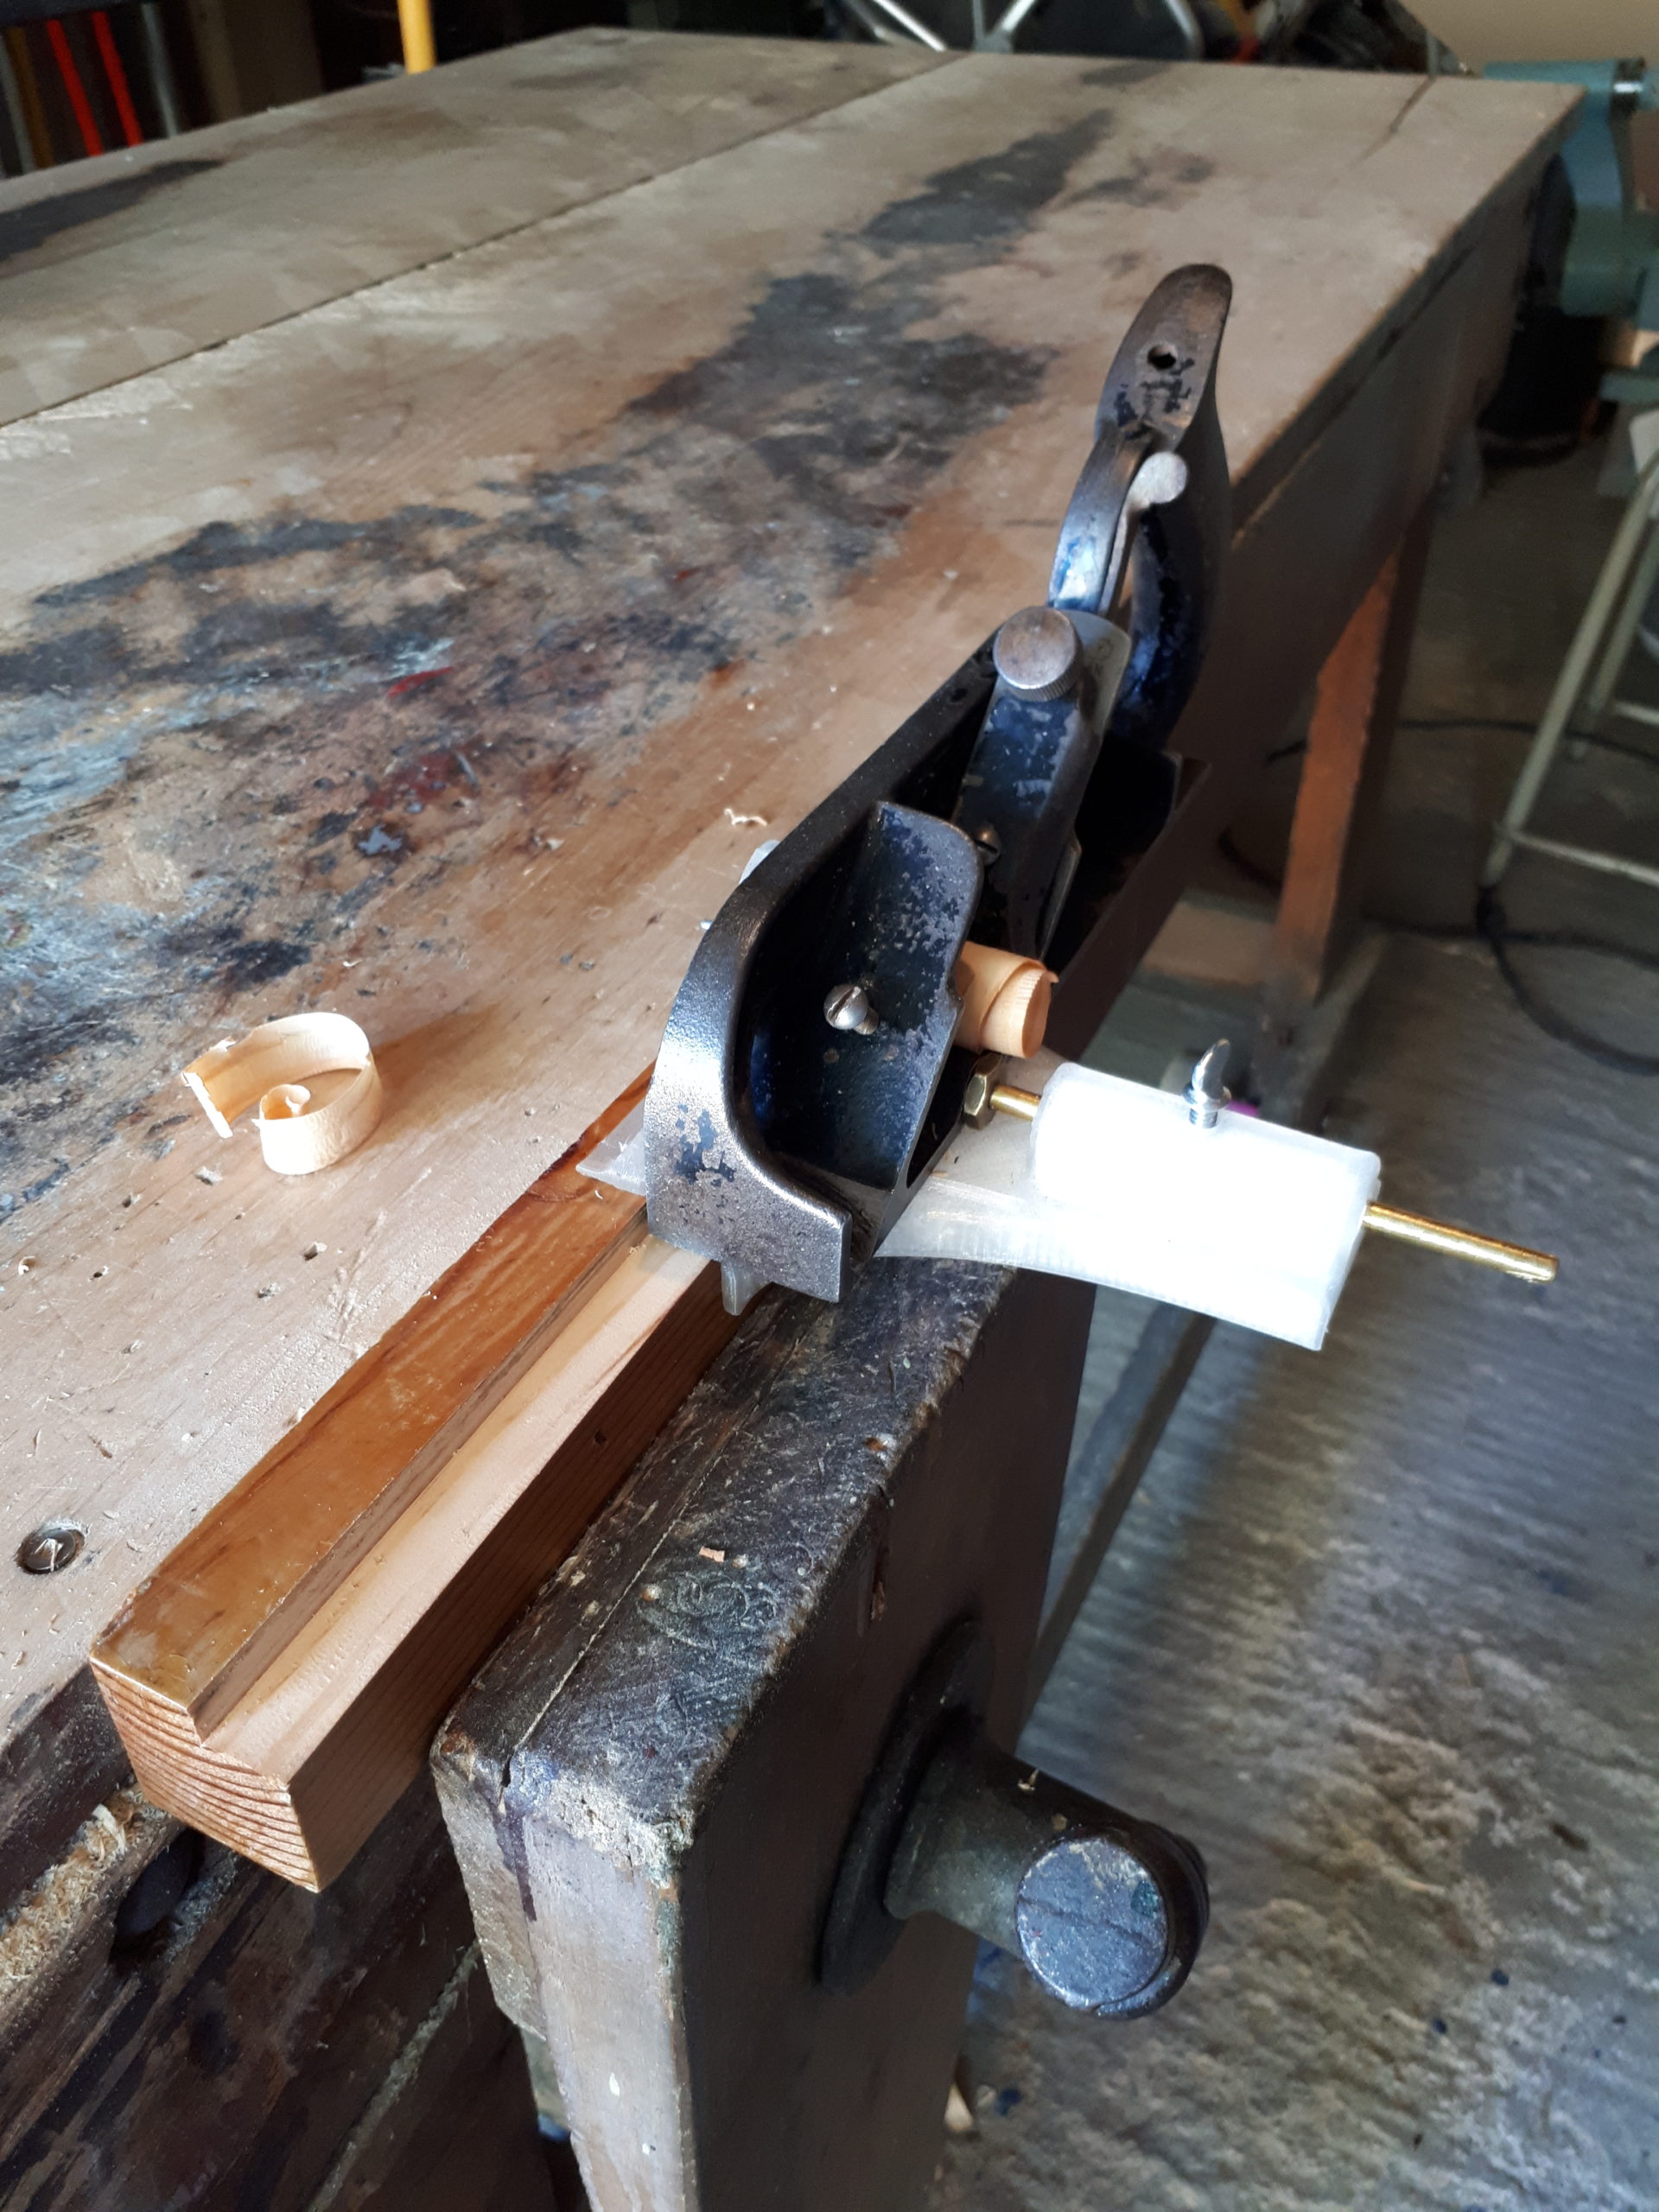
I picked up an old Stanley #78 rabbet and bull nose combination plane at a garage sale. It works OK as a bull nose and full-width plane, but it didn’t come with the fences needed to make consistent rabbets. I made the following 3D model in Fusion 360 and printed it, this is the final tweaked version. It also requires some nuts and bolts, and I had to re-cut one of the holes in the plane body because it used some crazy non-standard thread.

Stanley #78 fence and depth stop fence model.f3


Shakshuka

Shakshuka in a frying pan
  • 1+ onion, diced
  • 0+ red bell pepper, seeded and diced
  • 2+ tbsp of prepared garlic
  • 2 tsp paprika
  • 1 tsp cumin
  • 1/4 tsp chili powder
  • 1 28-ounce can of whole peeled tomatoes
  • 6 large eggs
  • salt and pepper, to taste
  • 0+ fresh or prepared cilantro, chopped
  • 0+ fresh parsley, chopped
  • 0+ feta
  1. fry up onion and garlic until they start to brown
  2. add spices, pepper and tomatoes and simmer
  3. break up tomatos with a potato masher or similar so they are not too big but still have some texture
  4. make a  hole for each egg and crack the egg into the sauce
  5. cook with a lid for 5-8 minutes depending how you like your egg
  6. Add feta, cilantro and parsley

Handling the Kirby Cup

Kirby Cup with old handles

I was asked to replace the handles on the new Kirby Cup Rowing Trophy.  The trophy is vintage and has clearly had a previous life. It arrived with straight handles that didn’t really suit its curvy shape, and that were somewhat loose in any case.

I designed some new handles for it in Fusion and 3d printed them.

Kirby Cup with old handles

Block heater cord

In order to start after -30C nights most cars around here have block heaters. Usually the plugs hang out from a radiator slot or just from under the hood. So in that-30C you have to hold the male end and hold the female end while wrangling a -30C stiff cable, while wearing mittens if you have any sense. I wanted the cord to be a bit tidier on the car, and make it so that plugging in is a one-handed thing that can be done more easily with mitts on. So, I took an existing plug and build a Casing for electrical cord plug to mount on a flat surface
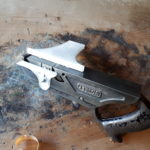
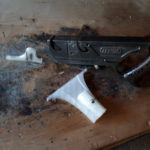
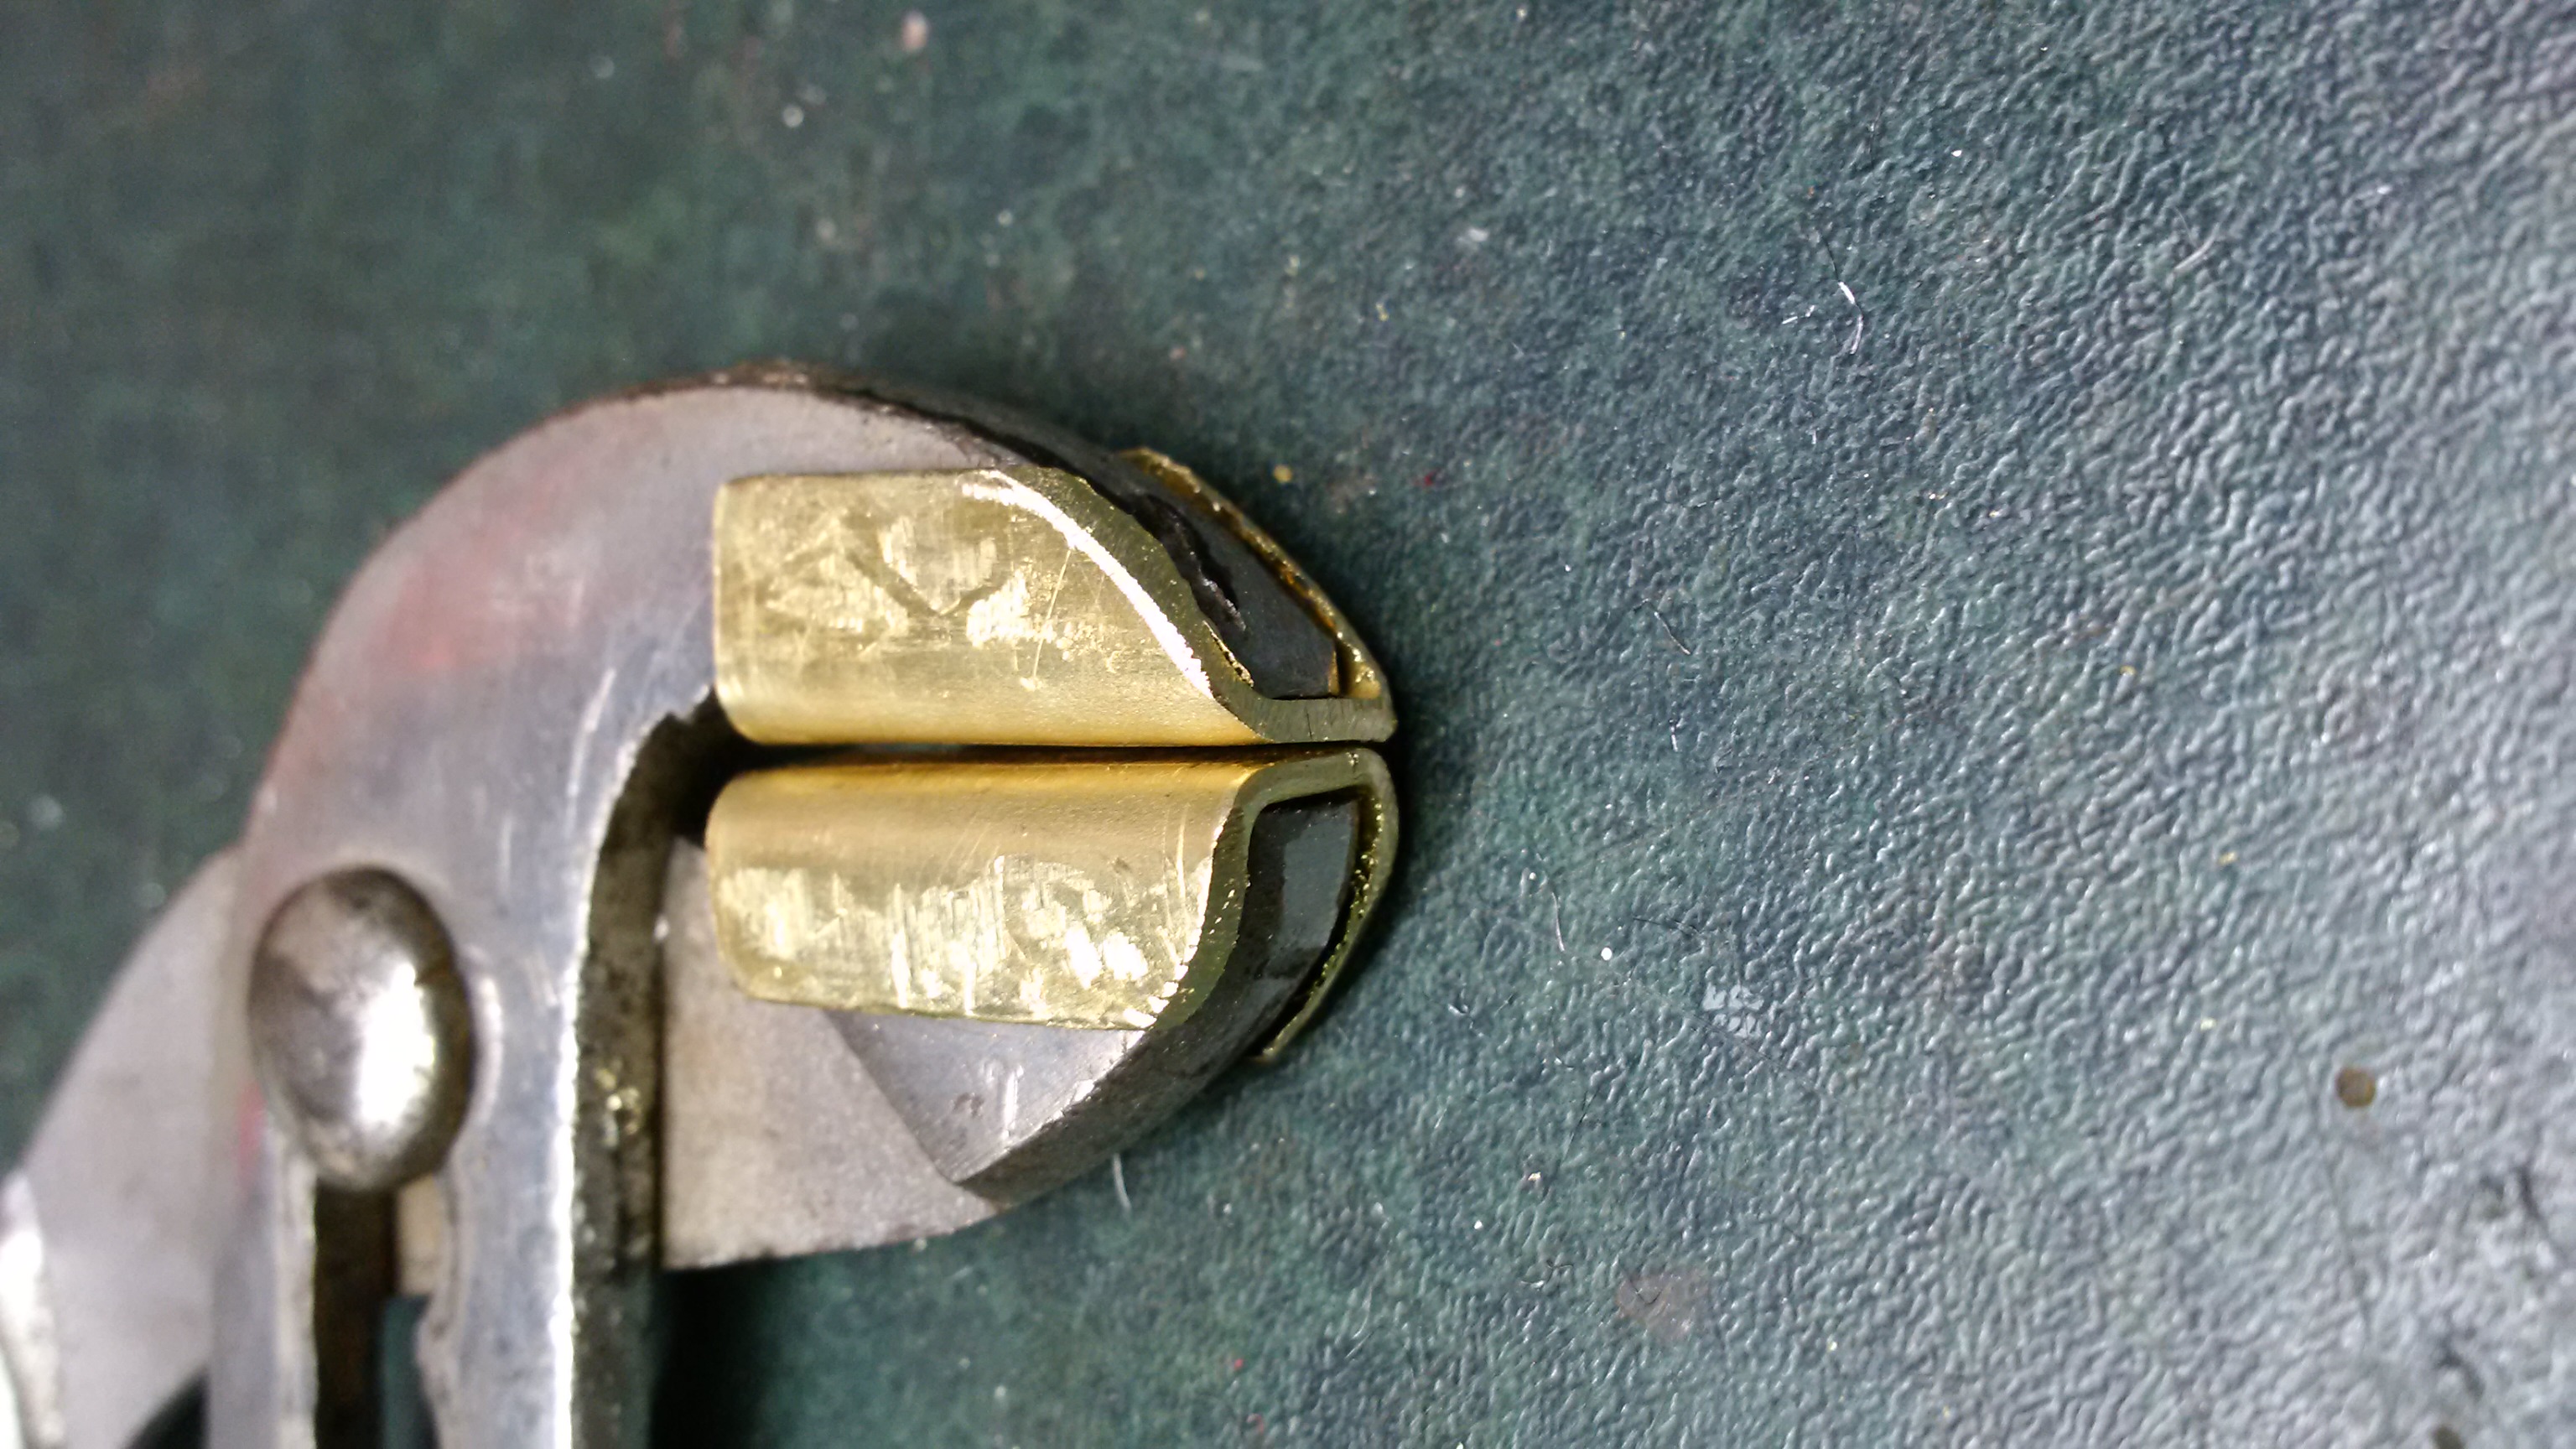
new body for it. I have done 3d modelling before, but this was my first exposure to Autodesk’s Fusion 360. It is the nicest 3d modelling software I have used so far – very easy transition from other tools I have used and it just works. I feel like a total sell-out to use it instead of an open source product like FreeCAD, but it’s like I tried crack, there is no going back.
A friend 3d printed the model for me, we installed it on Friday. The temperature was only -11C and sunny, but with a bit of wind. It was not optimal for playing with small parts and bare hands, but we got it done. For now the setup works, but it will be interesting to see how well the body and the silicon glue pad I used to hold it on will hold up. Generally gluing things in -11C is not a good idea, but this pad did better than I expected.  New blog heater plug on my car

Tape Gun Masking Tape Dispenser

wall mounted tape gun with masking tape

I use masking tape a lot to label stuff, tack stuff in place mark a spot when measuring. And of course for masking.

Finding the start of the roll is a nuisance.
So, I put some in a tape gun and mounted it upside down so it’s a dispenser when stored.
I was not sure at first how well this would work since the tape is mounted sticky side up. I have had this up for more than 6 months now, and sometimes the tape isn’t used in weeks. I am pleasantry surprised how well it still works after that.